

It’s an thrilling time. You’ve simply purchased (or been given) a brand-new laptop, changing that older one you’d been hanging onto for some time.
You may be tempted to begin utilizing it as quickly as doable, however a phrase of warning: this may occasionally imply you’re with out entry to a few of your favorite apps or weak to viruses and different malware.
Irritating as it could be, it’s price taking some time to get your laptop computer, desktop PC and even pill arrange correctly. It’ll prevent numerous trouble additional down the road and guarantee all of your vital information stays protected and safe.
This tutorial focuses on Home windows, with strategies for each Home windows 10 and Home windows 11. The method on Apple’s macOS is barely completely different – see our sister website Macworld for an in depth tutorial.
Step 1 – Energy on
It sounds extraordinarily apparent, however you'll be able to’t get anyplace with out turning in your gadget.
The facility button is nearly universally indicated as a small vertical line inside a circle, however the place it’s positioned will completely different by mannequin. On laptops, the most typical place is on the top-right of the keyboard, whereas desktops differ between the back and front of the monitor or laptop case.
As soon as that’s taken care of, you’ll then must undergo the first-time setup course of.
On Home windows 10, you’ll have to pick your area and language, comply with the licence phrases, personalise the color scheme, select a reputation in your PC, select a Wi-Fi community, resolve whether or not to just accept the so-called “specific settings” or customise, and log in to your Microsoft account.

The method is extra streamlined on Home windows 11, with simply area, language, Wi-Fi and privateness settings required. Simply comply with the directions on the display and it needs to be pretty easy. Chances are you'll be supplied a subscription to Xbox Sport Move, but it surely’s straightforward to say no.
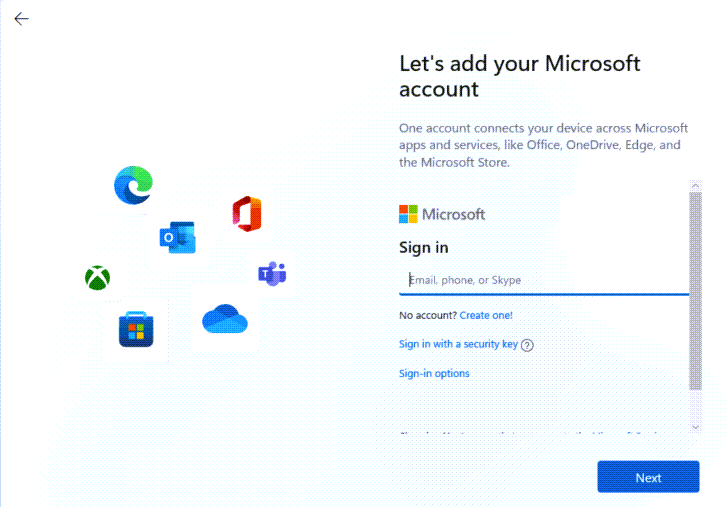
Microsoft
You'll be able to technically nonetheless arrange Home windows and not using a Microsoft account on Home windows 11 or 10, but it surely’s not really helpful. You’ll miss out on options equivalent to OneDrive cloud storage, the Microsoft Retailer and the pre-installed Mail app.
However even if you happen to resolve in opposition to OneDrive, it’s positively price utilizing a cloud storage service moderately than counting on native recordsdata alone.
Step 2 – Take away bloatware
Perhaps, your new machine will come pre-loaded with all types of software program that you just gained’t need. A few of it would simply be helpful however, for most individuals, the phrase “bloatware” is an efficient description as a result of these trial packages expend house in your laborious disk and may decelerate your PC.
To see what’s already put in on Home windows 10, open the Begin menu (Home windows emblem within the backside left), then the cog icon to open Settings. From there, head to System > Apps to a discover a checklist of all of the packages you've in your gadget. It would shock you the way a lot there's, contemplating you’ve solely simply set it up.

Click on any app you’re positive you don’t need anymore, then click on ‘Uninstall’. It could uninstall mechanically, or launch a wizard to allow you to do exactly that. Repeat for every app you’d wish to take away.
On Home windows 11, the method is barely easier. Open Settings through the Begin menu or trying to find it, then select Apps > Put in apps. For any you’d wish to take away, click on the three dots subsequent to its listed measurement and select ‘Uninstall’.
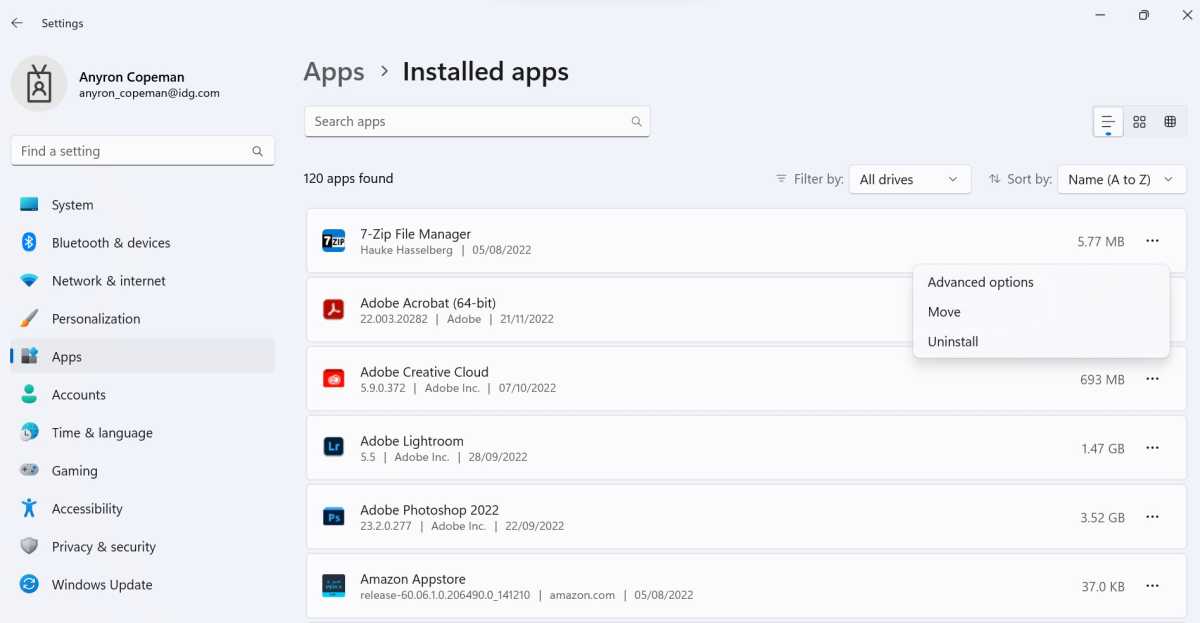
Anyron Copeman / Foundry
Nevertheless, if you happen to’re uncertain about something, the most effective coverage is to depart it when you do a little analysis about what its precise goal is. Antivirus software program may be safely eliminated (offered you’re changing it with one other one), however go away most issues referring to the processors or producer of your gadget.
Step 3 – Set up a number of apps without delay
You might need an concept of the primary few apps you’ll wish to set up, however what if you happen to might obtain a lot of the foremost ones suddenly?
That’s what this system Ninite gives, and it’s utterly free for Home windows 10 and 11. Simply head to the Ninite web site and tick the field subsequent to every app you’d like to put in – my decisions could be Chrome, Dropbox, Zoom, Spotify, Audacity and Malwarebytes.
Then, simply click on ‘Get Your Ninite’ from the underside of the web page, and a customized installer might be downloaded for you. If any of those apps are already put in, they’ll be up to date to the newest model. This makes it a straightforward manner to verify key apps are all the time updated.

Ninite
Handy as it could be, although, don’t be tempted to pick stuff that you just’re in all probability not going to make use of. In any case, it doesn’t make numerous sense to rid your new PC with bloatware, solely to then add a lot more undesirable software program.
Step 4 – Set up particular person apps
Ninite may be good for putting in a wide selection of utilities and free packages, however when you've got costly software program that you just purchased in your previous laptop and use often, you’ll in all probability need it in your new gadget.
We’re not speaking about free apps which can be broadly obtainable right here – they will simply be downloaded at any time. Most individuals use the likes of Microsoft Phrase or Adobe Photoshop through a subscription lately, whether or not it’s Microsoft 365 or Adobe Inventive Cloud.
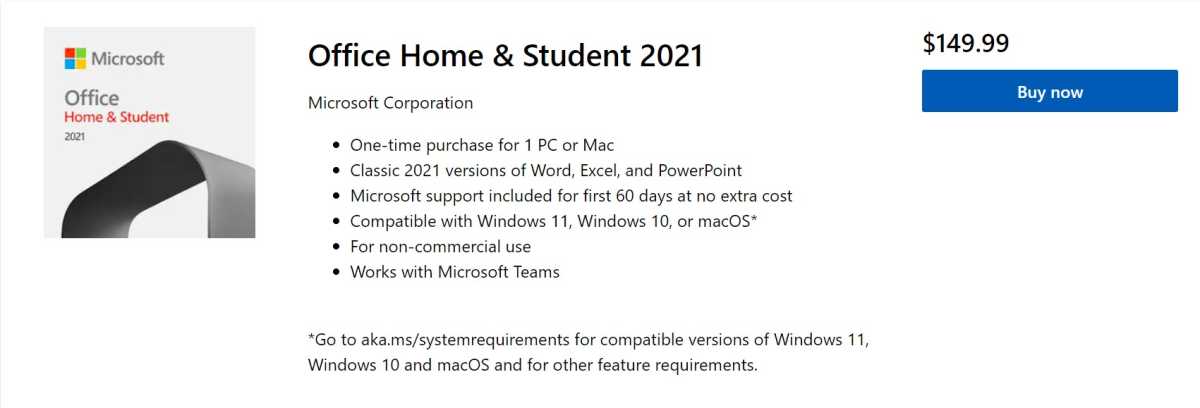
However new standalone variations of Microsoft Workplace apps are launched each few years, whereas older Adobe apps could possibly be bought subscription-free. Your current licences will in all probability help you set up it in your new laptop (offered you’re not restricted to at least one gadget), however what if you happen to can’t login or have forgotten the licence key.
Anyron Copeman / Foundry
It’s price contacting the client help groups from the corporate who makes the app in query, however there are different potential options. Magical Jellybean and Belarc Advisor are free utilities which can be capable of extract the licence key from many (however not all) widespread packages. Run the utility in your previous gadget to find the mandatory keys earlier than trying to re-install the software program in your new one.
If all else fails, it’s price contemplating the free options to widespread apps. LibreOffice and Google Docs work effectively as phrase processors, whereas GIMP or the web-based Pixlr E do a great job of fundamental picture enhancing.
Step 5 – Tweak settings
There are a great deal of completely different customisation choices, but it surely’s price getting some arrange immediately.
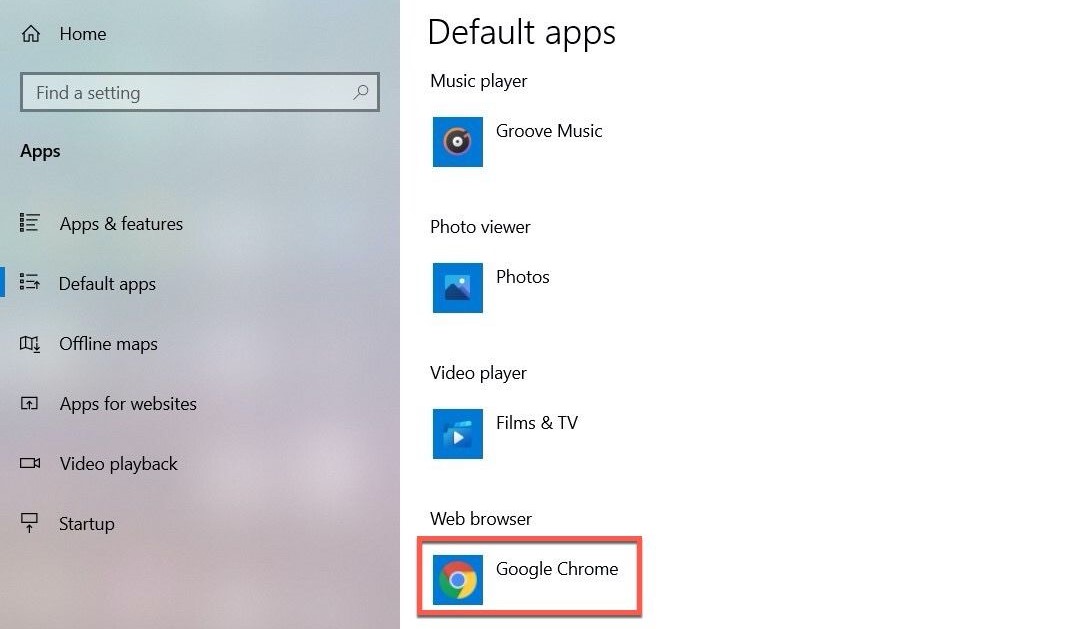
One instance is default apps – those which is able to open once you click on a hyperlink, play music, view images or entry your emails. Should you don’t just like the defaults of Mail, Media Participant, Images and extra, these can all be simply modified.
On Home windows 10, head to Settings > Apps > Default apps. Click on the presently chosen default for any class, then select one of many options. The instance under reveals the default Microsoft Edge browser swapped for Google Chrome, a change many customers will wish to make.
Anyron Copeman / Foundry
On Home windows 11, issues work a bit in another way. Right here, you select the default for a particular file kind, or select defaults on an app-by-app foundation. Head to Settings > Apps > Default apps to make your picks.
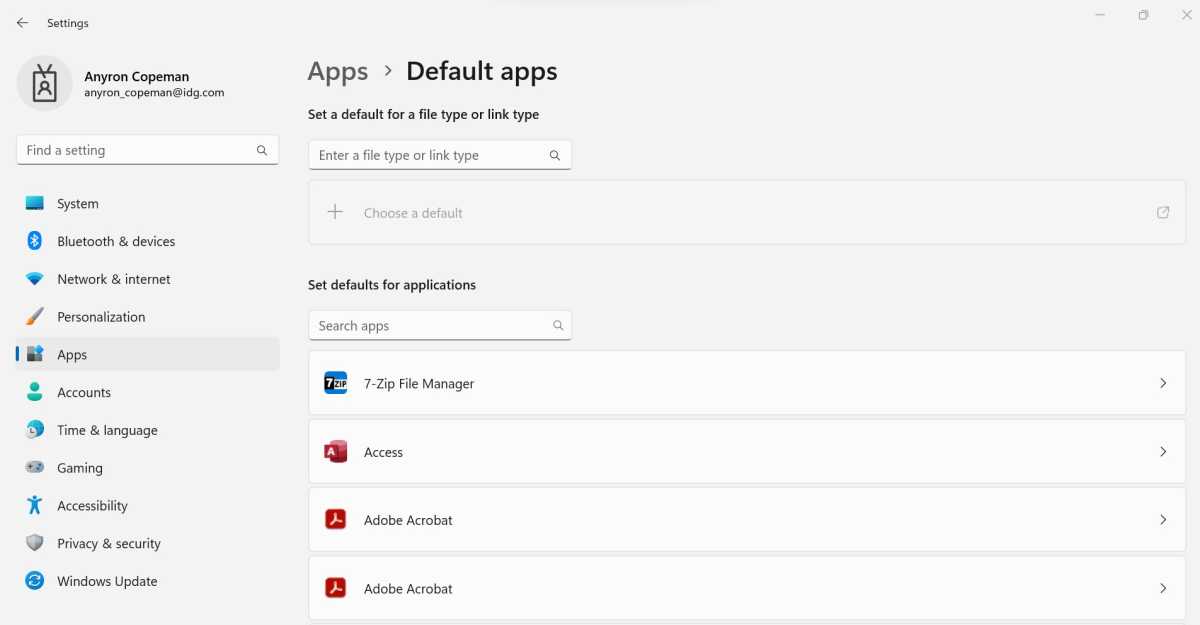
Anyron Copeman / Foundry
Nevertheless, that’s simply the tip of the iceberg in terms of customisation on Home windows. Head to Settings > Personalization in Home windows 10 and 11 and see what you just like the look of.
One key space that you just may like to customize is the Begin menu, and we've separate tutorials for each variations of the working system:
Step 6 – Switch recordsdata out of your previous gadget
You’ll actually wish to switch your varied paperwork, music, movies and images out of your previous laptop. The best manner to try this is through OneDrive, Microsoft’s cloud storage system that’s instantly built-in into Home windows 10 and 11.
After backing up the whole lot to OneDrive to your previous gadget, it merely requires you to sign-in along with your account particulars and obtain the info to your new laptop computer or PC. A full information to this may be discovered on the Microsoft web site.
It may be tempting to repeat the whole lot to your new gadget, however that’s not the most effective method as there could also be some muddle you'll be able to do away with. Take this as a chance for a great spring clear, deleting any recordsdata you don’t want any extra. Don’t overlook in regards to the Downloads folder both, which hardly ever has something you’ll want to repeat over.
Step 7 – Kind out a backup technique
Having spent all this time getting your new laptop setup precisely as you prefer it, it’s could be nightmare if all this tough work was misplaced. The important thing to avoiding that ever taking place is to create a picture of your disk drive on an exterior storage gadget, which you'll then use to revive it later.
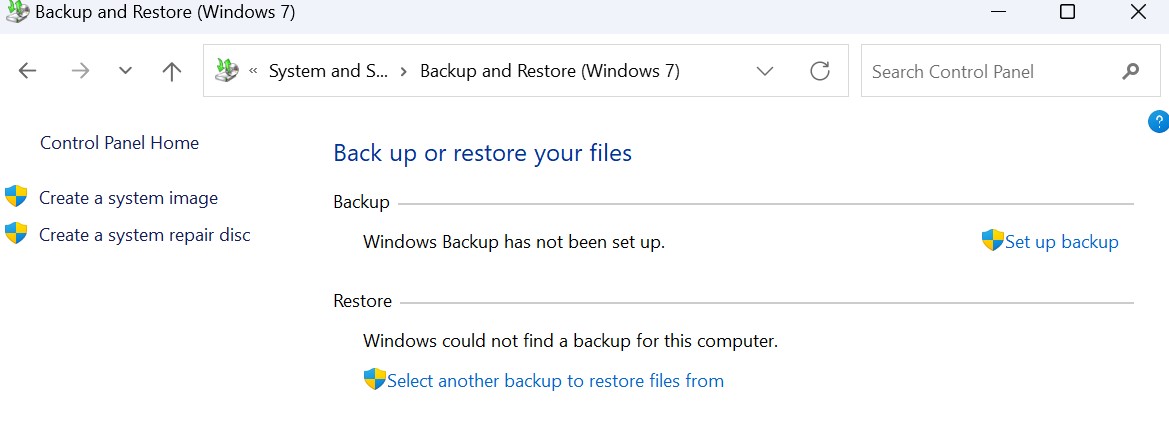
This may be achieved through Management Panel, a legacy app that’s nonetheless obtainable on Home windows 10 and 11. Open it, then select ‘Backup and Restore (Home windows 7)’ beneath the ‘System and Safety’ heading.
Click on ‘Arrange backup’ and comply with the directions, selecting the storage gadget you've linked because the vacation spot.
Anyron Copeman / Foundry
Alternatively, you need to use a third-party device equivalent to AOMEI Backupper. Acronis Cyber Defend Residence Workplace is much more succesful, however prices $49.99/£34.99 per 12 months.
See the most effective moveable laborious drives you should buy to ensure you get a dependable one.
Nevertheless, this needs to be used along with the backup choices inside Settings, moderately than as a alternative. On the Home windows 10 app, head to Replace & Safety > Backup and guarantee ‘Routinely again up recordsdata’ is turned on. Be taught extra in our separate information on again up Home windows 10.
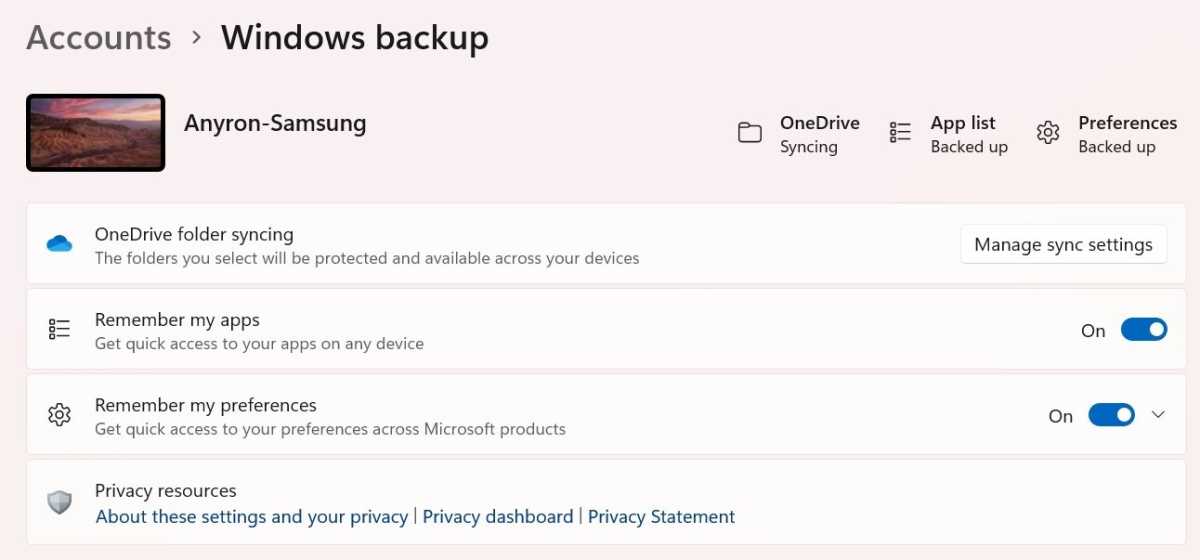
In Home windows 11, it’s Accounts > Home windows backup and select ‘Handle sync settings’ subsequent to ‘OneDrive folder syncing’
Anyron Copeman / Foundry
That’s it! Your laptop computer or PC is now able to go. It would really feel like a protracted course of, but it surely’s price it and solely must be finished as soon as.